
How We Use Blender’s Unique Rigging Features at Cloth Cat
By Lead Tech Artist Josh Doyle
Rigging can be a complex process. Whether it’s a simple prop rig or a full biped rig, knowing efficient techniques and best practices will benefit the animators who use the rigs and help the rigging team to work together.
I’m Josh Doyle, Lead Technical Artist at Cloth Cat, where my tasks mainly include 3D rigging in Blender and developing animation workflow. I have been in the animation industry for over 8 years. I studied 3D animation at the University of South Wales. I have worked at a couple of studios, but mainly at Cloth Cat. However, at Cloth Cat we offer an outsourcing service, which has allowed me to work with several other studios to assist with their rigging needs.
One of my first jobs at Cloth Cat was the 3D animation series “Shane the Chef”, for which we used Autodesk’s Maya. When that project was complete, the studio decided to investigate switching to a more accessible 3D animation software. Blender has had a growing user base for some years now and, since the release of version 2.8, its features have advanced for it to be a contender in production use. Our games team was already using Blender and it made sense to use the same software wherever we could.
We now have over 5 years of experience in using Blender on productions and it has become our go-to for 3D animation projects, such as our BBC Bitesize series and Annibendod. We have developed efficient modeling, rigging, animation, and rendering workflows using it, running regularly on our render farm and through our shot management too.

I won’t go into too much detail about our blender rigging process, which would be too long for this article, but I will discuss some of Blender’s unique rigging features. The armature object took me a while to get to grips with! Maya or 3ds Max is a bit more straightforward – they use joint (bone) objects put in a hierarchy to form your rig. Whereas Blender’s armature object contains all the bone data and they can only be accessed via Blender’s edit and pose modes.
At first, I found this confusing, but now it’s essential in my rigging process. It keeps the files outliner contained and easier to organize. More importantly, it makes transferring a rig from one character model to another simpler in my opinion. I can just scale the armature object to fit the new character mesh and apply the scale transform, or, for an exact transfer, I can go into edit mode and adjust the bones’ positions.
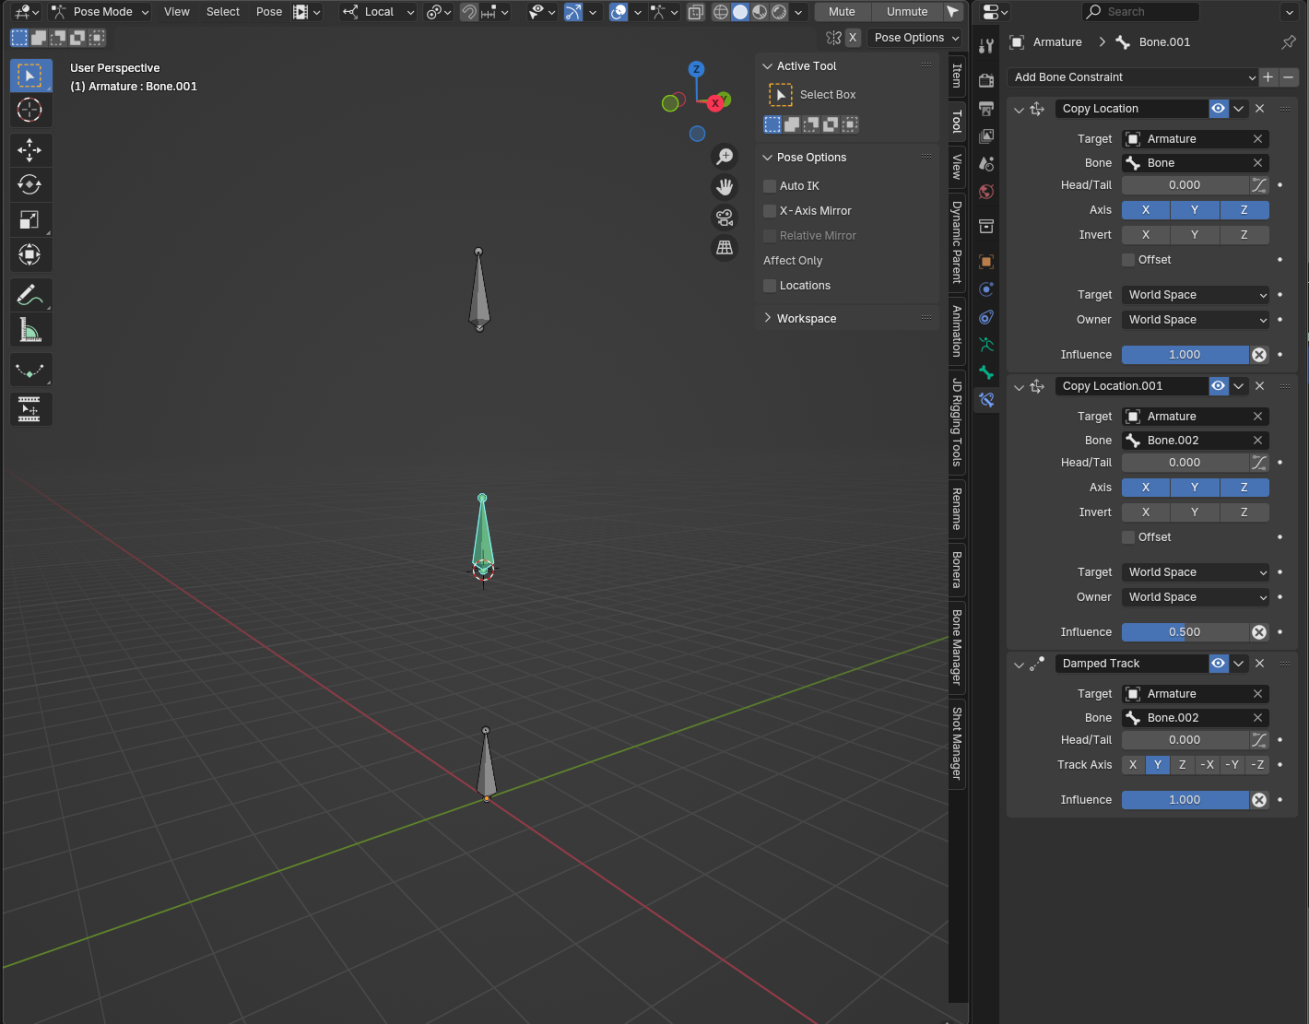
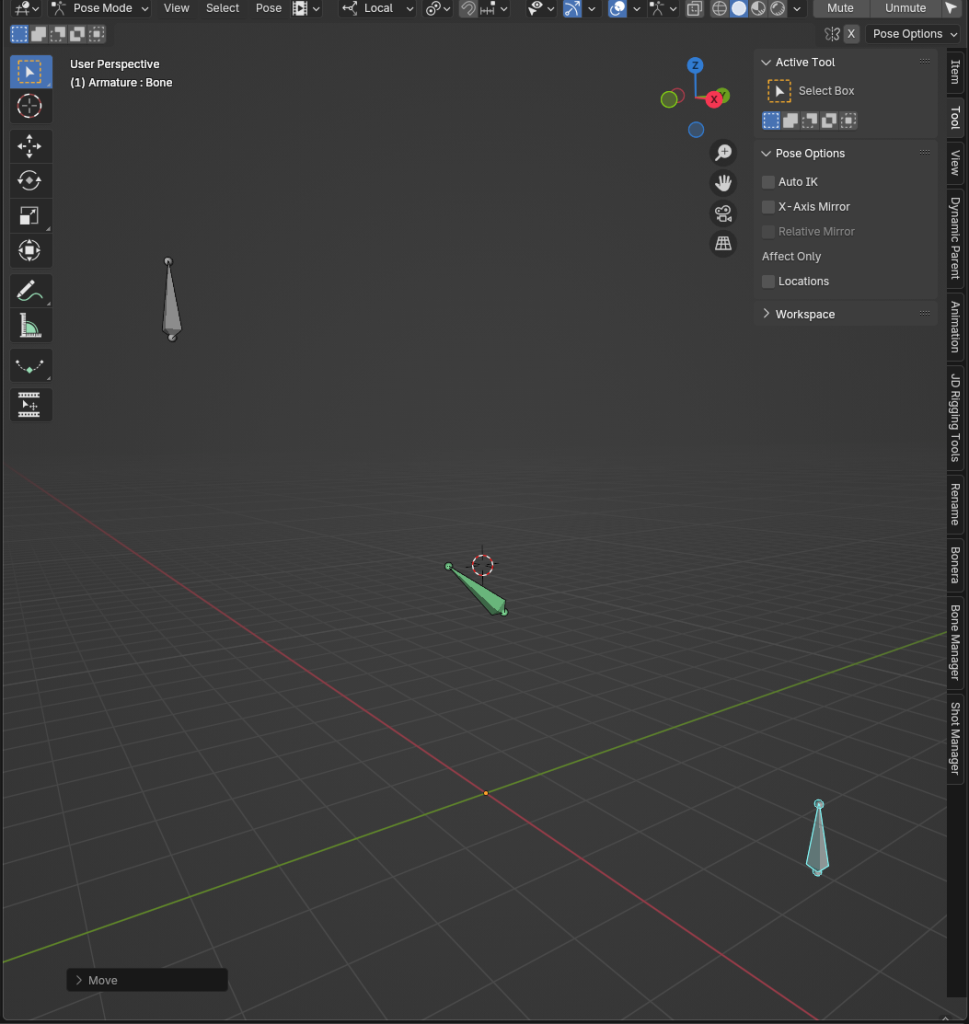
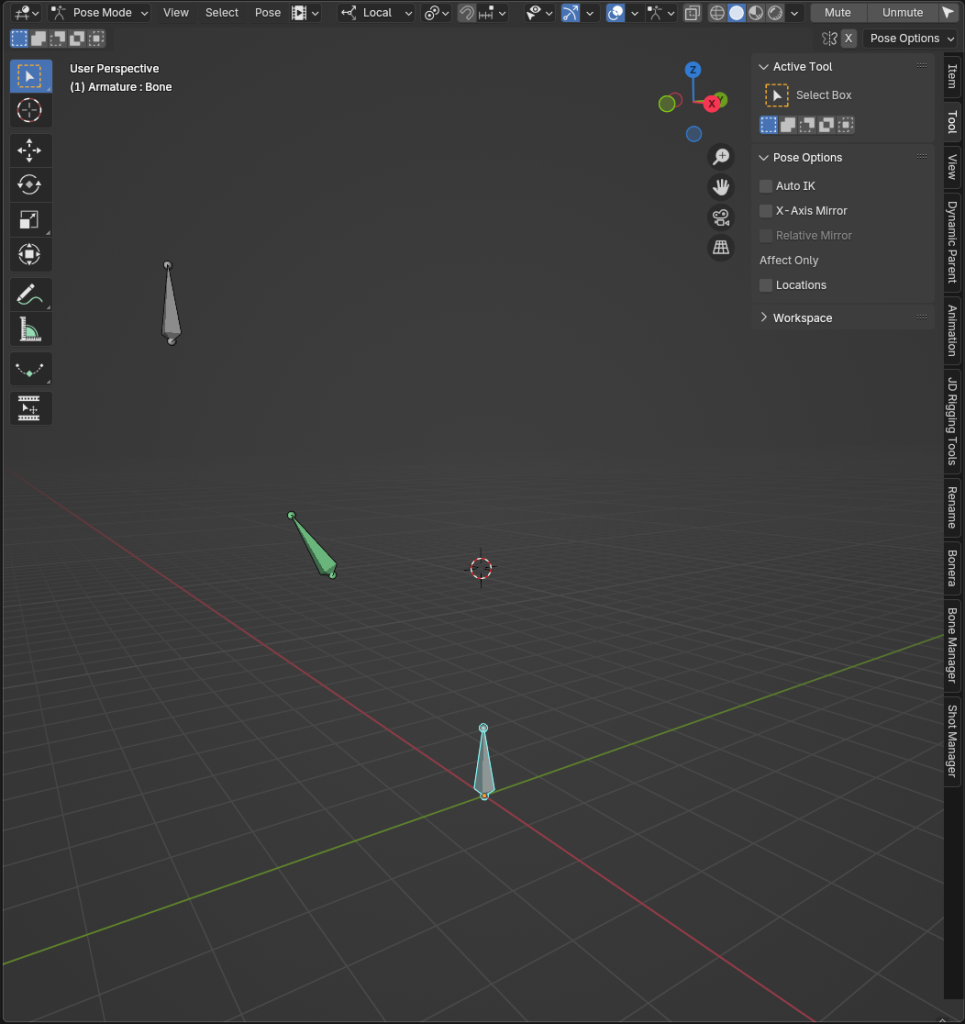
Blender has modifiers and constraints like most DCCs, but in Blender they are stackable on the same object/bone. This is useful for making mechanical setups simply. For example, the centre bone has 3 constraints stacked on it so whenever the top or bottom bones are moved, the centre bone will stay in their exact midpoint and rotate to stay aligned.
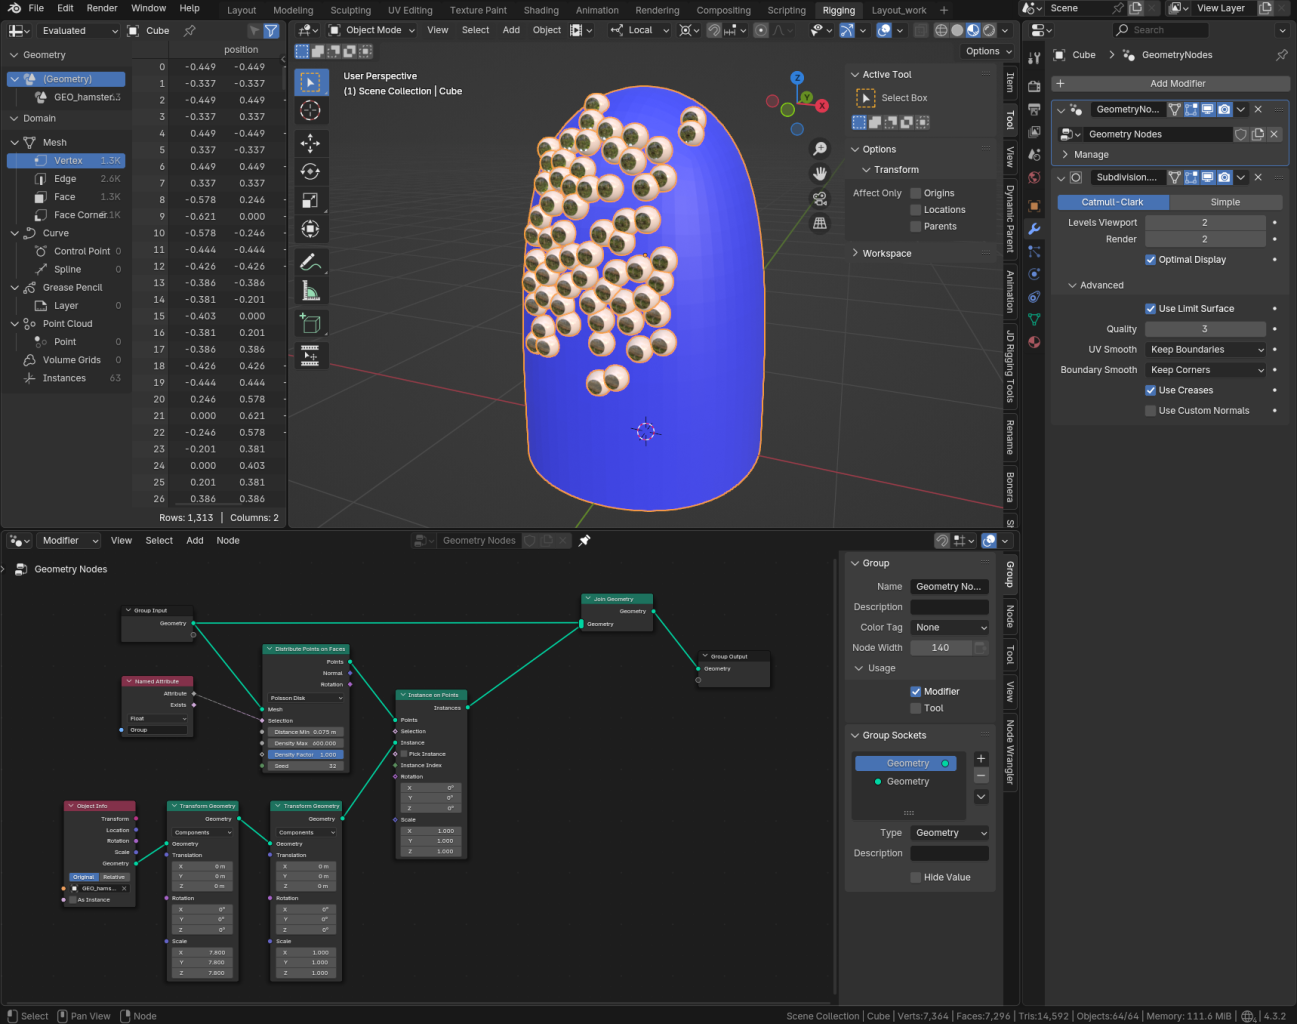
While it is not strictly a rigging feature, geometry nodes are a powerful feature that can procedurally generate geometry. While very useful for generating trees on an outdoor set or even making a crowd simulation, it also has some uses in rigging. For example, we have a monster character that needs hundreds of eyes.
The traditional rigging approach would be to duplicate, place and add a bone for each eye to control them. This process could be automated using scripts, but not all artists have coding skills. A geometry nodes approach would not only generate and place the eyes as instances, making the file less data-heavy but they can also be controlled via a transform node.
These are just some of the great rigging features Blender has to offer. The Blender devs are hard at work bringing new features to the software in the future, such as integrated animation layers, bone pickers, and rigging nodes.
I’m really looking forward to trying these features out on new projects! There’s always something new to experiment with at Cloth Cat.